Retro consoles are built to last, but dust, dirt, and aging components can lead to performance issues over time. Whether it’s sticky buttons, cartridge reading errors, or yellowed plastic, keeping your classic gaming hardware in top shape requires proper cleaning and maintenance. Fortunately, with the right tools and techniques, you can restore your old consoles, improve their performance, and extend their lifespan.
Many people don’t realize that some cleaning methods can actually damage retro hardware. Using the wrong products—like alcohol on screens or water on circuit boards—can cause permanent damage. That’s why it’s important to know what works and what doesn’t when cleaning and maintaining your retro consoles. This guide will provide practical cleaning tips using easy-to-find products, along with a section debunking common myths about console cleaning.
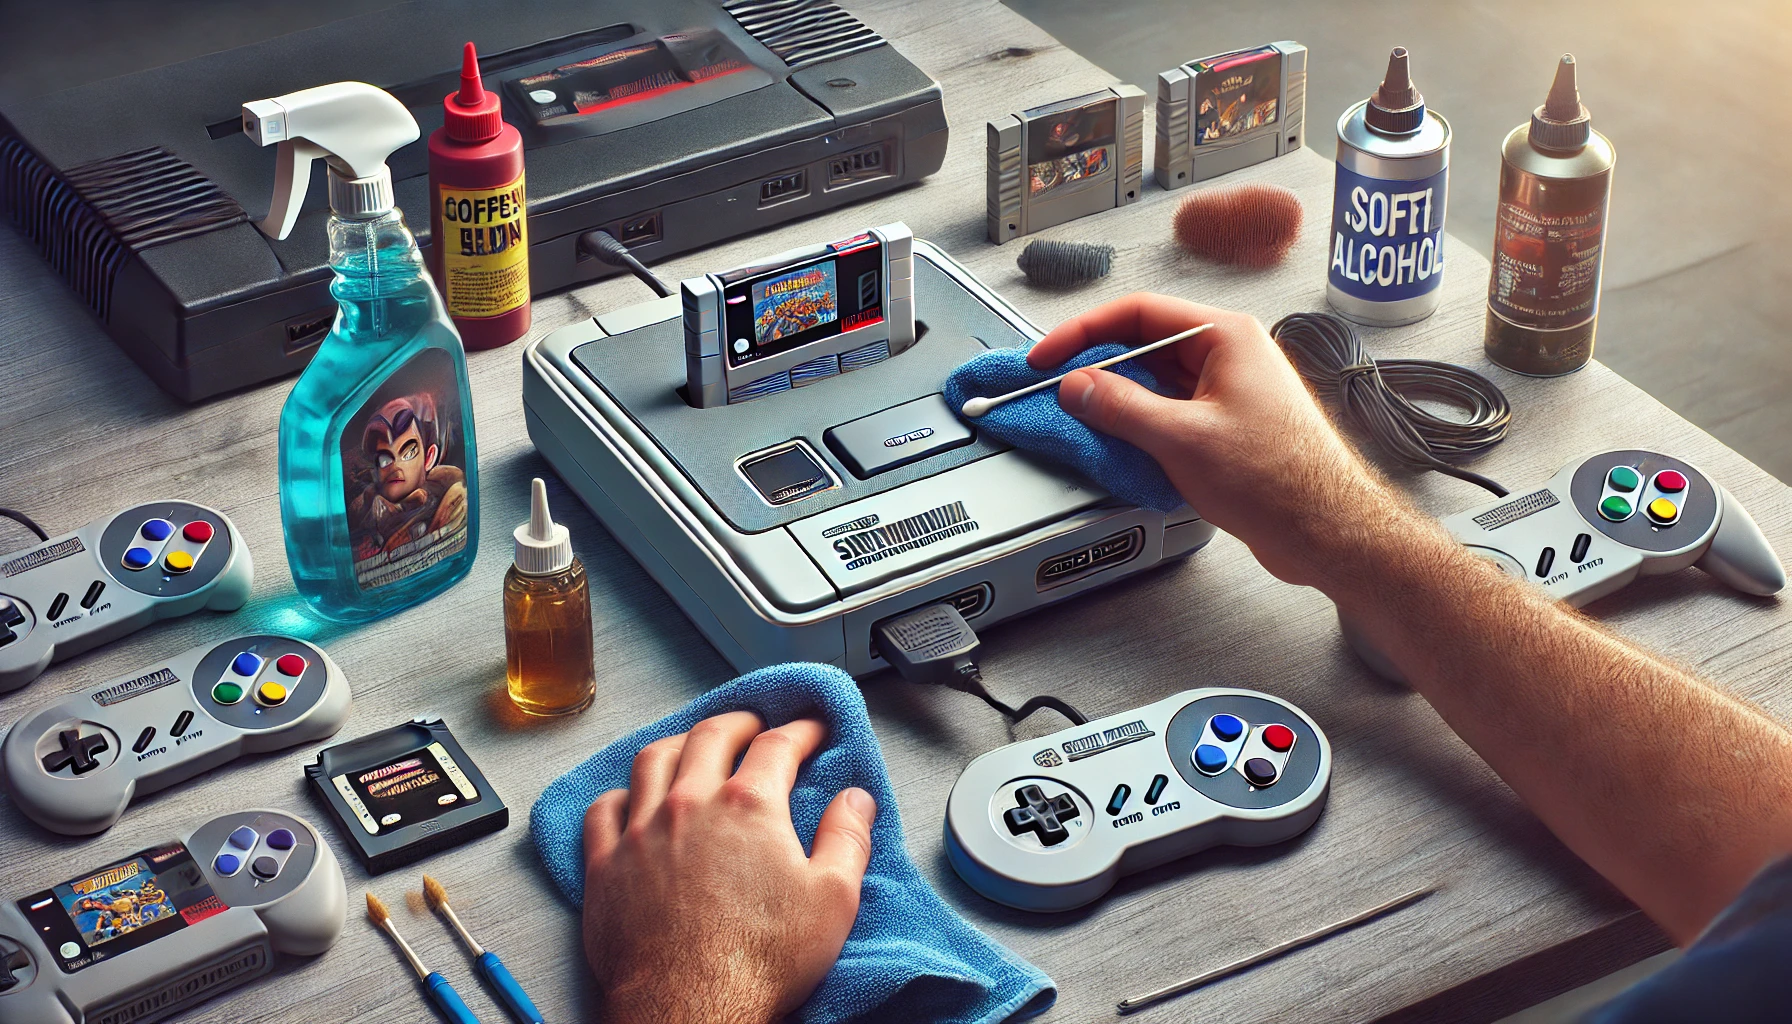
Essential Cleaning Supplies (Easy to Find & Safe to Use)
✅ Compressed Air – Perfect for blowing dust out of cartridge slots, vents, and controller ports.
✅ Isopropyl Alcohol (90% or Higher) – Safe for cleaning cartridge contacts and circuit boards.
✅ Microfiber Cloth – Ideal for removing dust and fingerprints without scratching.
✅ Cotton Swabs & Soft Brushes – Great for cleaning around buttons, ports, and small crevices.
✅ Magic Eraser (Melamine Sponge) – Excellent for removing yellowing and deep stains from plastic.
✅ Plastic Polish (Like Novus 2 or Brasso) – Used for restoring scratched console shells and controller buttons.
✅ Philips & Tri-Wing Screwdrivers – Required for opening Nintendo consoles and controllers safely.
✅ Silicone Grease or Contact Cleaner – Used to lubricate sticky buttons and improve joystick movement.
How to Properly Clean a Retro Console (Step-by-Step Guide)
1. Cleaning the Console Exterior
First, unplug the console and remove all accessories. Use a microfiber cloth with a small amount of water or mild soap to wipe the surface. If the plastic is yellowed, a magic eraser or hydrogen peroxide treatment can restore its original color. Avoid using harsh chemicals like acetone, as they can melt or discolor plastic.
For deep stains, apply a plastic polish like Novus 2 and gently buff with a soft cloth.
2. Cleaning Cartridge Slots & Disc Drives
One of the most common issues with retro consoles is reading errors due to dirty cartridge slots or disc drives. To fix this:
- Use compressed air to blow out dust and debris.
- Insert a clean cotton swab with isopropyl alcohol into the cartridge slot and gently rub the pins.
- If a disc drive struggles to read games, clean the laser lens with a lens cleaning solution and a microfiber cloth.
3. Cleaning Controllers and Buttons
Controllers accumulate dirt and grime over time, especially in button gaps and analog sticks. To clean them:
- Use a toothbrush or soft brush to scrub around the buttons.
- Apply isopropyl alcohol on a cotton swab to clean around the buttons and D-pad.
- If buttons are sticky, open the controller with a screwdriver and clean the contacts inside.
- For analog sticks, apply a small amount of contact cleaner or silicone grease to improve responsiveness.
4. Restoring Yellowed Plastic
Some older consoles, like the Super Nintendo and Sega Dreamcast, develop a yellow tint due to oxidation. This can be reversed using retrobrighting:
- Apply a mix of hydrogen peroxide and a small amount of oxygen bleach to the yellowed plastic.
- Wrap the console in plastic wrap and expose it to sunlight or UV light for a few hours.
- Rinse and dry thoroughly.
This process can restore consoles to their original color, but it should be done carefully to avoid over-whitening.
5. Preventing Future Dirt and Damage
After cleaning, take steps to keep your console in good shape:
- Store consoles in a dry place to prevent dust buildup.
- Use dust covers for cartridge slots to keep them clean.
- Avoid eating or drinking near consoles and controllers.
- Regularly clean air vents to prevent overheating.
Common Myths About Cleaning Retro Consoles
🚫 “Blowing into cartridges helps them work better.”
Blowing into cartridges actually introduces moisture and dust, which can corrode the contacts over time. Instead, use isopropyl alcohol on a cotton swab for a proper clean.
🚫 “Using Windex or household cleaners is fine for consoles.”
Many household cleaners contain ammonia or alcohol, which can fade or damage console plastics. Always use mild soap and water for cleaning the exterior.
🚫 “You can clean controllers by soaking them in water.”
Controllers contain sensitive electronics, and soaking them in water can cause permanent damage. Instead, clean them with a damp cloth and alcohol swabs.
🚫 “Magic Erasers work on everything.”
While Magic Erasers are great for removing dirt and stains, they are abrasive and can scratch glossy plastics if used too aggressively.
🚫 “Using a hairdryer can dry out wet electronics.”
Heat from a hairdryer can warp plastic or damage electronic components. If electronics get wet, let them air dry completely for at least 24 hours.
Keep Your Retro Consoles Running for Decades
Proper cleaning and maintenance can add years to the life of your retro gaming consoles. Whether you’re restoring a Super Nintendo, a Sega Genesis, or a PlayStation 1, using the right techniques and safe cleaning products will ensure better performance and a longer lifespan.
Have you ever restored a dirty or damaged retro console? What cleaning methods worked best for you? Share your experiences in the comments!